Chasing Shadows: Geolocate Images with Bellingcat's Shadow Finder Tool
Geolocation is often a time-consuming task.
Researchers often spend hours poring over photos, scouring satellite images and sifting through street view.
But what if there was another way to quickly narrow down your search area?
Bellingcat’s new Shadow Finder Tool, developed with our Discord community, helps you quickly narrow down where an image was taken, by reducing your search area from the entire globe to just a handful of countries and locations.
How Shadows Can Help
As many open source researchers know, shadows seen in images can provide extremely useful clues about when and where an image was taken.
By comparing the height of an object with the length of its shadow, you can learn how high the sun is in the sky.
At any moment, there is a single point on the earth where the sun is directly overhead, called the subsolar point.
At that point, a vertical stick would cast no shadow. If you travel away from that point, the sun will appear lower in the sky the further away you go. When the sun is lower in the sky, the shadow of your vertical stick will grow longer.
The distance a place is from the subsolar point determines exactly how high the sun is in the sky there.
At any given time, there is always a ring of places on the earth where the sun is at the same angle above the horizon.
If you know the date and time an image was taken, and can make accurate measurements of the height of an object and the length of its shadow, you can identify the ring of possible areas where the image was taken.
Tools such as SunCalc allow you to manually check a shadow’s length at specific places.
The Shadow Finder Tool removes the need for manual checks, and lets you search the entire surface of the earth with just the click of a button.
So, you don’t need to be a geometry expert, the tool does these calculations for you!
Testing the Tool: A Shore Thing
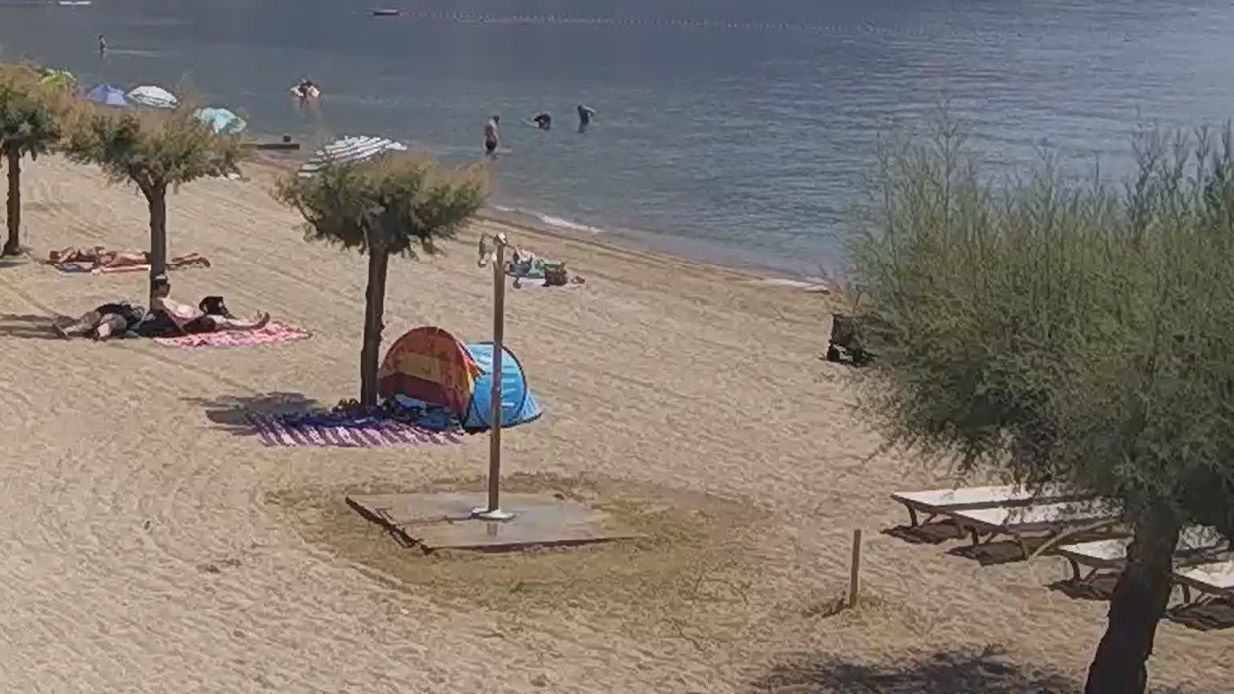
Let’s use Bellingcat’s Shadow Finder Tool to narrow down the possible locations of this sunny seaside image.

The first step is to work out the date and time the image was taken. There might be a clock in the frame, or helpful metadata contained in the file (use tools like Metadata2go or EXIFmeta to check for this).
It’s not always possible to work out the date and time, and metadata might not always be accurate, so keep this in mind before going any further.
In this case, our sandy beach image is a snapshot from a livestream, so we know exactly when it was taken: 2024-07-10 at 10:30:46 UTC.
You can enter the time in UTC (Universal Coordinated Time) or in the local time. It doesn’t matter if you don’t know the timezone. When you use local time, the tool converts the time into the local timezone for every location. Because of this, you won’t get a nice ring if you use local time, but the principle is the same.
Select an Object to Measure
Once you have confirmed the date and time, identify a clear, visible object and shadow in your image.
Measure the height of the object and the length of its shadow. Sometimes you’ll be able to measure the object and shadow directly in the image. Be aware that you might need to adjust your measurements based on the perspective of the image. Ideally the object you measure should be at a right angle to the camera.
You can read more about measuring objects in an image and managing the challenge of perspective in this Bellingcat guide.
In our example, let’s focus on the beach shower. There are larger shadows visible in the image, but this object is vertical and has a clear shadow. The shadow also falls on a near-flat surface (we can see standing water from the beach shower so any slope is small). It makes the measurements easier if the object is vertical and the surface is level.
From the camera’s perspective, the shadow is almost at a right angle to the object, so any distortion of measurement is likely to be small. Because of this, we can measure the image directly.
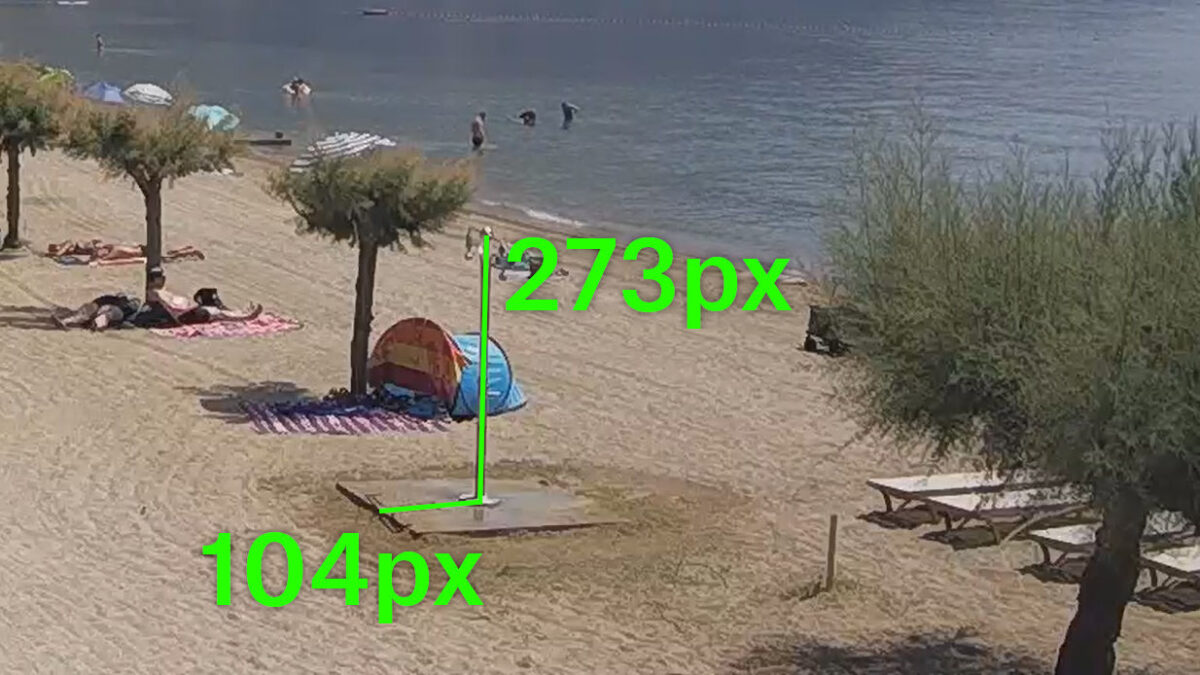
Use an image editor (such as GIMP) or a ruler to measure the object and shadow.
In our image we find that the object height is 273 pixels and the shadow length is 104 pixels. It doesn’t matter what units you measure in (you could measure in millimetres or inches) because it is the proportion between the two measurements we are interested in.
If you measure both the object and the shadow with the same units, Bellingcat’s Shadow Finder Tool will work.
Now, with your height measurements and time and date details to hand, open the Shadow Finder Tool.
Enter the object height and shadow length, as well as the date and time and click ‘▶’ to run the tool.
The tool will run (be patient, it can take a little time to load for the first run) and produce a map.

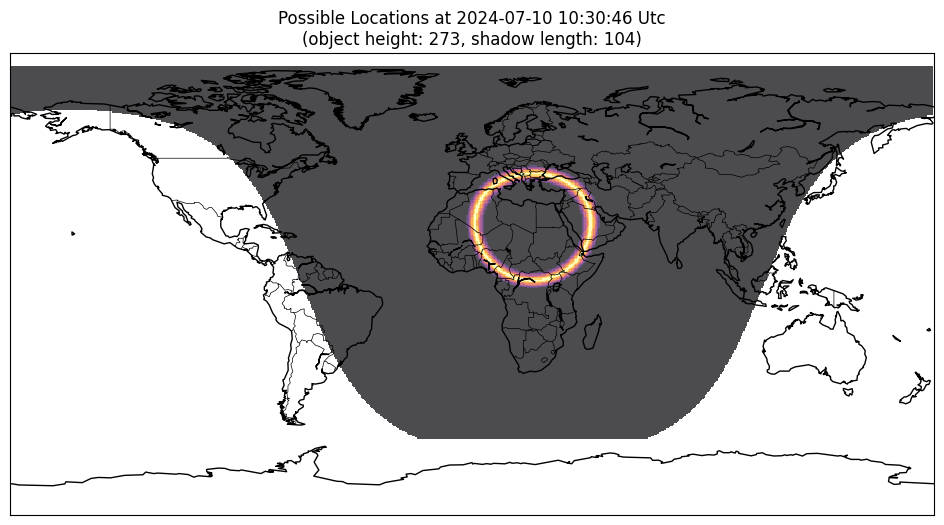
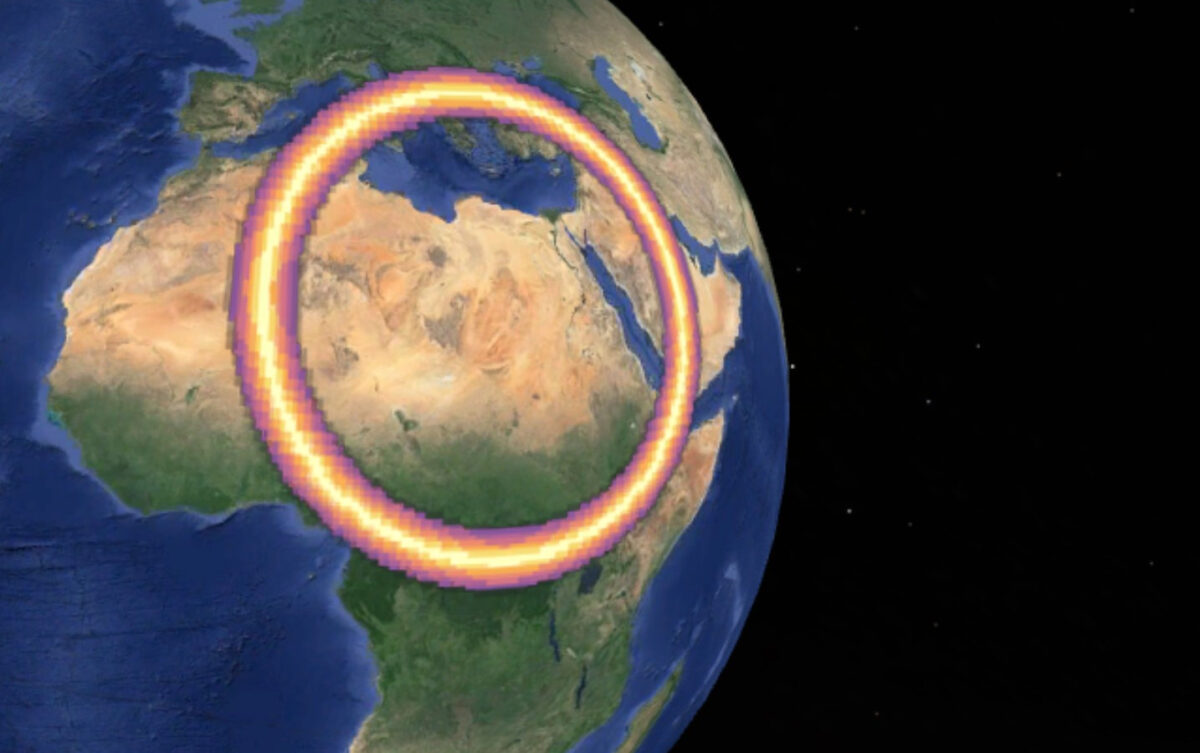
The map includes a yellow ring representing the likely locations of our seaside photograph.
By inspecting the map more closely we can see that the ring includes several landlocked areas and only a few areas of coastline, narrowing down our search even further.
In this case, the beach is likely on the coast of Algeria, Italy, Croatia, Yemen, Somalia, or Djibouti.
There are still several countries in this list, but we’ve now ruled out lots of locations around the world. We know that looking at Portugal, South Africa, or India would be a waste of time. We can now go back to the image and use other clues to narrow down the location even further.
What Challenges Can Affect Measurements?
There are lots of ways to measure objects and shadows in images, some more reliable than others. We have previously covered how to measure shadows and objects in these guides, here and here.
The following points highlight the ideal conditions to get the best results from the Shadow Finder Tool:
- The time and date of the image must be known
- The object and its shadow must be roughly at right angles to the camera
- The shadow must be cast on a surface level with the horizon (a flat floor)
- The image should not be significantly distorted by the camera lens (as with a fish-eye lens)
Advanced Geolocation: Time and Time Again
If you have several images taken at different times, you can narrow down the location even further with the Shadow Finder Tool. Here is another image taken from the same livestream the following day, a few hours later.
Drag the slider to compare the images and see how the shadows have moved.

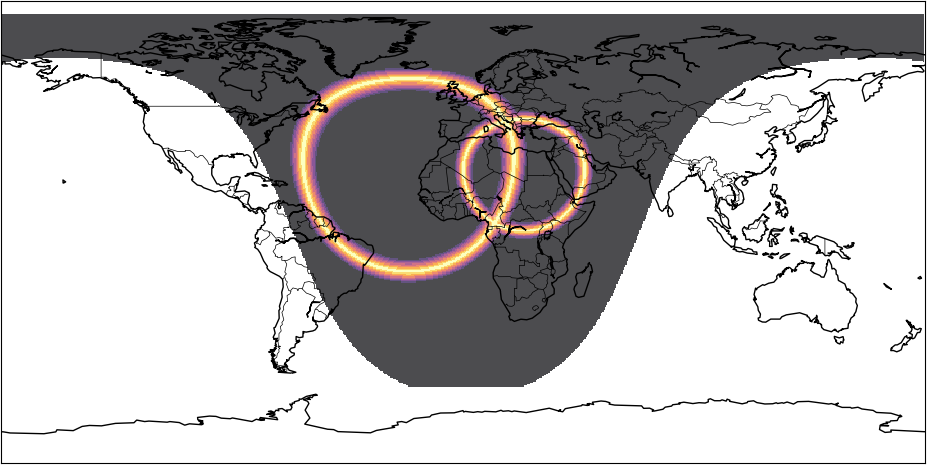
If we repeat the process outlined above and run Shadow Finder Tool again, we get a second map of possible locations.
This time the ring indicates a different set of possible locations.
The locations have changed because the Earth has rotated and the subsolar point has moved. Using an image editor, we can overlay the two images including both the new ring of possible locations and the previous ring.
By locating where they overlap, we can identify just two possible locations. Use the slider to see where the locations overlap.
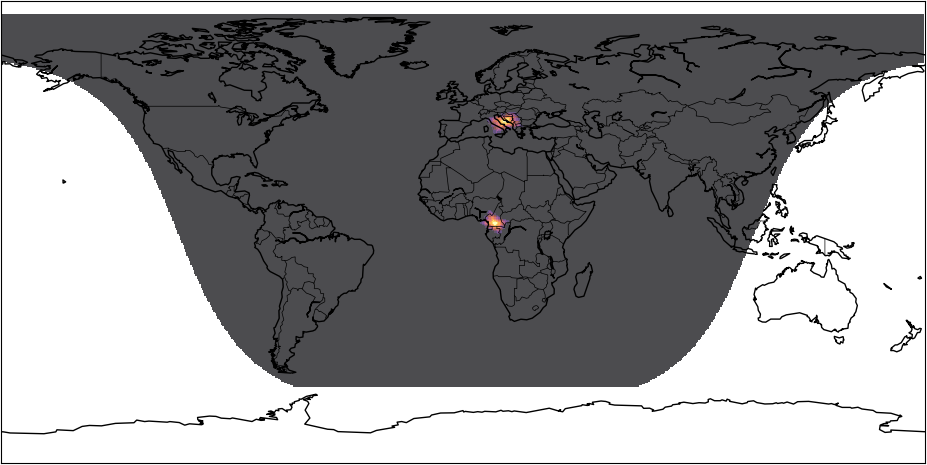
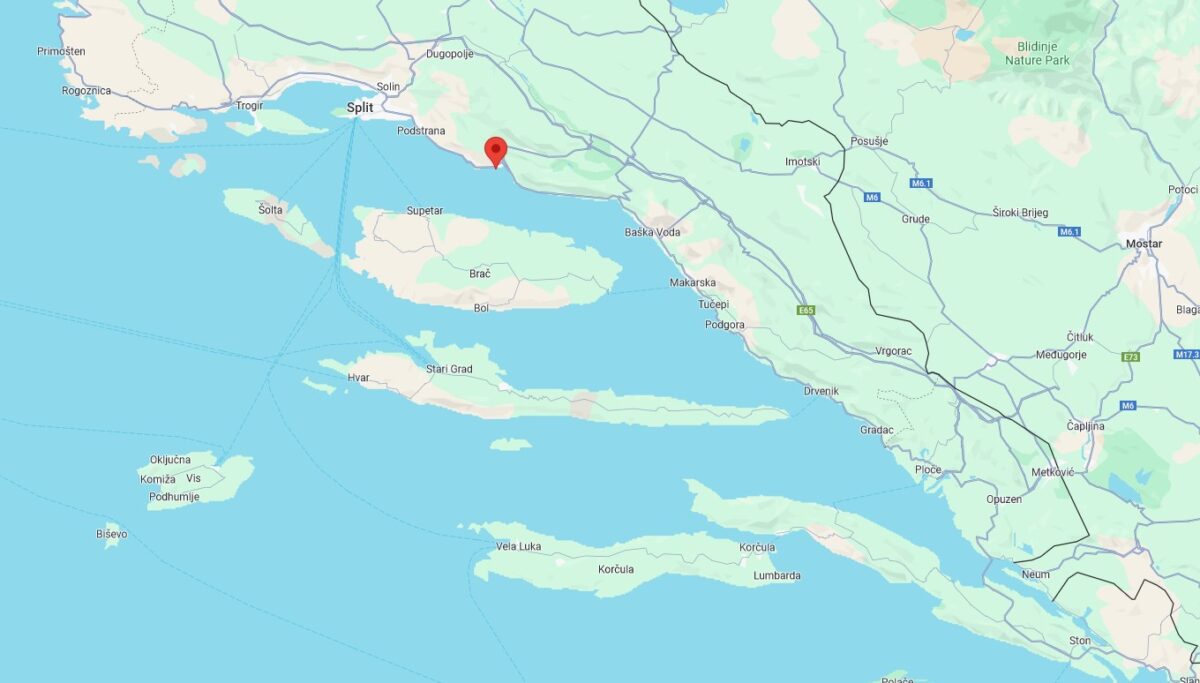
The overlay shows us only two possible locations: Cameroon and Croatia. The Cameroon location is inland, so we can eliminate it and focus on Croatia.
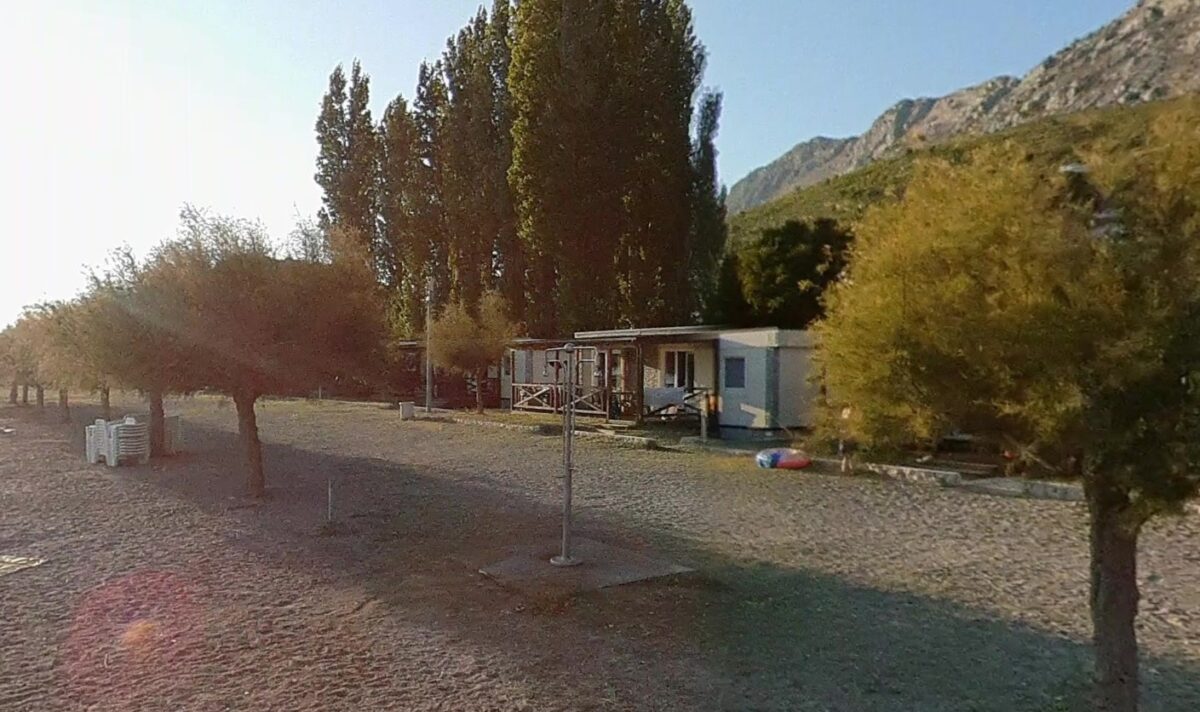
Zooming in leads us to focus on the coast and islands around Split. At this point, there’s no substitute for hard work. There are many beaches in that part of the world, but after searching for some time, it’s possible to find the location. There’s even a street view image in which the webcam is visible.
When geolocating any image, context matters. There are often many ways to narrow down a location without using shadows. But for those images where you know the exact time and date and there is a clear shadow, you’ll find that shadows can quickly point you in the right direction of where to look and swiftly narrow down possible locations of your image.
You can sign in with a Google account and start using Bellingcat’s Shadow Finder Tool, now.
Bellingcat is a non-profit and the ability to carry out our work is dependent on the kind support of individual donors. If you would like to support our work, you can do so here. You can also subscribe to our Patreon channel here. Subscribe to our Newsletter and follow us on Twitter here and Mastodon here.