Easy AI: A Simplified Approach to Classifying Images with Off-the-Shelf AI Models
Suppose you’ve scraped thousands of images from a Telegram group or social media site, some of which may be crucial to an investigation of an ongoing conflict. You’re looking specifically for photos and videos of weapons, but these are mixed in with memes, screenshots and other unrelated material, and manually reviewing and categorising the images would take more time than you have. What do you do?
In this guide, we show you how you can use artificial intelligence (AI) models to speed up such tasks – even if you don’t know how to code – with the help of the Smart Image Sorter, an open-source tool we created.
AI image classification has proven useful in previous investigations, such as those involving war crimes in Yemen or illegal mining in the Amazon rainforest.
Traditionally, this requires some degree of technical expertise – from knowing how to access AI models in the first place to training them to recognise specific categories of objects.
The Smart Image Sorter, however, uses a specific family of models – known as zero-shot models – that can be used off the shelf, making it easy for anyone to get started with classifying images with AI.
What is Zero-Shot Image Classification?
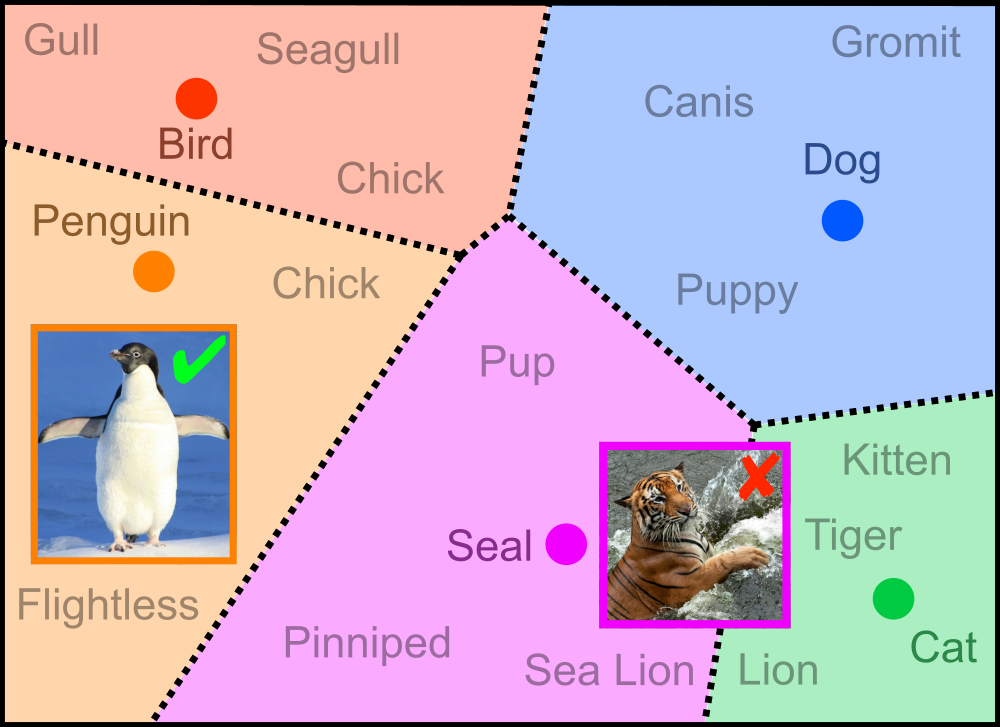
AI image classification models traditionally require training with specific labels linked to images. Users are limited to the categories predefined by the labels, restricting the model’s ability to identify anything outside the established labels. For example, a model only trained on images labelled as cats and dogs is likely to recognise these animals, but fail to identify a penguin due to the absence of images labelled as penguins in the training data.
Zero-shot models, a relatively new innovation in the field of machine learning and AI, help overcome these restrictions. They are trained on a diverse array of data and have a broad understanding of language and images, making it possible to classify images that were never included in their training. For instance, a zero-shot model might recognise a penguin by relating its black and white colours and bird-like shape to similar images it has seen, even if it has never been trained specifically on penguins.
Introduced in 2021, OpenAI’s CLIP (Contrastive Language–Image Pre-training) model has been influential in popularising this method of image classification due to its flexibility and robust performance.
CLIP and similar AI models learn to match pictures with descriptions by turning both text and images into numerical representations, known as embeddings, that a computer can understand. When you give them a new image or text, they check how closely it matches the things they have learned before by comparing these numbers in what is known as a shared embedding space.
Using the Smart Image Sorter with Google Colab
The easiest way to run the Smart Image Sorter is by running our programme on Google Colab directly in your web browser, and uploading any images you would like to use on Google Drive.
Google Colab is a free, cloud-based tool that allows users to write and execute Python code from web browsers using an interactive environment known as a “notebook”. Bellingcat has previously published a detailed guide and explainer video on how notebooks can be useful for open-source research.
1. Load the Tool
To begin, ensure that you are logged into your Google account. Open the tool in your browser and click “▶” to load it.
You will see a warning that the notebook was not authored by Google. This is a standard warning for any notebook loaded from an external source. Don’t worry: none of the code used in this tool is malicious, and it does not grant Bellingcat or other users access to your data. To proceed, click on “Run anyway”.

You should see five form fields that have been pre-filled with default values. If you simply want a quick idea of the output generated by this tool, you may skip to Step 7 and run it immediately. Otherwise, read on.
2. Add Your Own Images (Or Use Ours)
The first field you have to fill in is the source directory, which is simply where the images you want to classify are stored.
For the purposes of this tutorial, we have provided a sample set of 32 images, from a previous Bellingcat investigation on QAnon groups on Telegram, as the default source directory.
However, if you would like to use your own image collection, upload the images to a folder in your own Google Drive and click on the “Mount Google Drive” button to give Google Colab access to your Google Drive. (This will not grant Bellingcat or any other users access to your files or data.)
Get the path of your image folder by right-clicking on the relevant folder in the file manager, and selecting “Copy path”, then paste it into the “Source” field.

Note: Mounting your Google Drive will not work if your Google account is part of the Advanced Protection Program, as this blocks most non-Google apps and services from accessing data like your Google Drive. If you are unable to mount your Drive but want to save the results beyond your Google Colab session, you may want to run the tool locally.
3. Tell The Tool Where to Save the Sorted Images
Now that you have told the programme where to find the images, you also need to tell it where to copy or move the images after it has sorted them.
If you would like to save the sorted images, it is important that you mount your Google Drive as explained in the previous step. Otherwise, you can still run the programme and see how the model sorts the images, but the output will disappear at the end of your Google Colab session.
Once you have mounted your Google Drive, you can copy and paste the path of an existing folder from the file manager, or create a new folder by typing in its name at the end of an existing path.

4. Choose a Model
The Smart Image Sorter uses the most downloaded zero-shot image classification model on Hugging Face as the default model. As of date of publication, this is “clip-vit-large-patch14”, a CLIP-based model by OpenAI. You can change this to any other model available on Hugging Face.

While CLIP suffices most of the time, you may wish to try a different model if you are not getting the results you want, or for more specific use cases. For example, if you want to geolocate images, we suggest trying StreetCLIP by setting the model field to geolocal/StreetCLIP and using countries, regions, or cities as candidate labels. You can find more tips on choosing a model later on in this guide here.
5. Add Labels
Labels are the categories that the model will use for classification. This is a very important step as the model will always assign a label to every image in your dataset. For example, if you only include labels for “people” and “animals” but give it an image of a house, it will categorise this image under the label that it thinks matches the best. Hence, the labels should be comprehensive, covering virtually all possible images in the dataset, and should not overlap. You can find more advice on writing effective labels later on in this guide here.

6. Decide Whether to Copy or Move Images
By default, the tool copies the files into the destination folder. We recommend this setting so you can check the results against the original images. However, you can also change the “Operation” setting to move the images from the source to the destination folder instead, which can save you some storage space.

7. Get Your Sorted Images!
When you have filled in all of the fields, click on the green “Start Classification” button to run the programme.
The tool will output some system messages while it loads the model and makes predictions. At the end, it should display the message: “Classification finished”.
Once that is done, you will be able to find your sorted images in the destination folder you have specified.

Running the Tool Locally
In some cases, you may wish to run the Smart Image Sorter locally rather than on your browser – such as if you are dealing with sensitive or confidential images that you do not want to upload online, or if you are unable to mount your Google Drive.
To do this, you can download the notebook from the GitHub repository and run it on your machine, using your local directories as the source and destination folders. You can find instructions for how to use the tool either directly through the command line or using Jupyter Notebook – an open-source tool that allows you to run notebooks locally – in the repository’s README file.
Evaluating the Results
Now that you have your sorted images, you’ll want to evaluate the results.
For small image collections, it should be easy enough to inspect the results by checking the images in each subdirectory. For a larger dataset, you might want to choose a random sample of images and manually categorise them, then run the Smart Image Sorter to see the overall performance and how accurate the model is for each class.
Hopefully, running the Smart Image Sorter classifies your image files the way you expect. However, if it does not, you may want to experiment with different labels and models.
The Hugging Face library is a good starting point to start exploring other open-source AI models. As of August 2024, it features more than 530 models for zero-shot image classification, with more added continuously. You can filter these to see the latest or trending models.
The model names usually give us clues about their specific characteristics. For example, the ViT-Base-Patch16-224 refers to the “base” version of a Vision Transformer (ViT) model. This suggests it has fewer parameters and is more computationally efficient but less complex than a “large” version of the same model. This model processes images with a resolution of 224×224 pixels, which are divided into smaller segments or patches of 16×16 pixels. Generally, the smaller the “patch size,” the more detailed the analysis the model can perform, as it captures finer details within the image.
You may also want to explore task-specific models. As noted before, visual investigations involving image geolocation can make use of StreetCLIP, which has been trained to predict countries, regions and cities. Other models are useful for investigations in certain languages: AViLaMa focuses on African languages, and there are multiple options for Chinese text that can be easily found on Hugging Face.
The quality of your labels is another important factor. A paper published in 2021 indicates that small changes in wording can result in huge differences in performance. In one of the experiments, the researchers achieved a 5% increase in accuracy by just adding the article “a” before the class name.
Tips for Writing Effective Labels
Write in English (unless running language-specific models). As the dominant language in the data used for training AI models, English content usually leads to better results. The obvious exception is if you are running language-specific models such as AviLaMa.
Know your data. Begin by gaining a rough idea of the most commonly recurring themes in your image collection by randomly inspecting the images, if possible. Remember that the model will always assign one of the candidate labels to an image. If your candidate labels are “buildings” or “vehicles” and you present a photo of fruit as the input image, the model will still choose one of the available options, even though neither label is appropriate. Thus, you should choose a set of labels that can describe all potential images in your collection.
Choose distinct labels. As these models measure the semantic distance between the input image and each label provided, we want to avoid overlapping labels. Ensure your labels are not too similar to each other, such as “army” and “soldier”.
Add context. Zero-shot models benefit from labels with additional context relevant to the task. For example, if you want to classify weaponry images, instead of using only “AK-47” as a label, you could try input text such as “AK-47, a type of firearm” or “A photo of an AK-47”. Likewise, try “a picture of a person” instead of “people”. Good labels for zero-shot image classification are more akin to short descriptions than single-word categories.
Keep it short. While you should add context, too much of it may confuse the model. We suggest keeping your labels to fewer than 80 characters, but a description under ten words should be enough for most cases.
Avoid words with multiple meanings. Use precise terms to clearly define the candidate categories, and avoid vague or ambiguous words. Remember to add context to handle cases in which the same word might have multiple meanings.
Use common terminology. Widely used words and common terms are preferred. Jargon, slang or regional-specific terms may be harder for the model to understand as such words may not crop up as much in its training data.
Start broadly and narrow it down. For complex categorisation tasks, a good strategy would be to choose broad categories and then repeat the classification to narrow down the images into subcategories if needed. For example, after classifying image files with categories such as photos or screenshots, you can repeat the process for photos by classifying them as indoor or outdoor pictures. If you are using our notebook, just replace the source folder of the second run with the destination directory used in the first run.
Limitations and Alternatives
Like any application, the Smart Image Sorter is neither perfect nor necessarily the best tool for every use case.
While automatic image classification can speed up visual investigations, it does not replace human intelligence. In most cases, you would still need someone to manually inspect the results to correct any misclassifications and gather insights from the results.
In addition, all AI models reflect the biases and limitations of their training data. Facial recognition technology has been found to be less accurate in identifying darker skinned women, for example, as their training datasets are often disproportionately white and male. Similarly, the accuracy of zero-shot models is likely to decrease with labels in languages other than English due to the lack of sufficient training data.
Since zero-shot models are general models, they tend to struggle with specialised domains that require detailed contextual knowledge. For example, they have not been very effective at identifying hateful memes targeting individuals or vulnerable communities.
Written text in the images can also interfere with the predicted labels. Experiments conducted by OpenAI researchers in 2021 indicate that, in some cases, CLIP-based models can be misled by simply placing hand-written tags over objects.

If you don’t achieve the results you desire with zero-shot image classification, you may wish to explore alternatives. For example, you can manually label a few images and instead try few-shot image classification – a method where you provide the model with a small number of examples to learn from – or even train a “traditional” image classification model if you have enough labelled data. However, these alternatives fall outside the scope of this guide as they require more resources and expertise, whereas the approach we have outlined here aims to make AI image classification accessible to all.
Help Us Improve the Smart Image Sorter
The Smart Image Sorter and the models it utilises are completely open-source. This means you can use it for free, without any rate limits, and you can also contribute to its development even if you don’t have coding experience. For instance, you can help by reporting bugs, suggesting new features, improving the documentation on GitHub or translating this guide to other languages.
If you are an experienced developer or machine learning expert, you can help us to improve the software or the user interface for beginners. There are many possible improvements, such as:
- Enhanced error handling and exception management to make the script more robust and ensure informative error messages.
- Accepting videos as input, extracting frames or keyframes before processing;
- Adding support to similar computer vision tasks, such as zero-shot object detection or visual question answering.
To get involved, check out our repository on GitHub, create an issue to discuss a new idea or request, or submit a pull request.
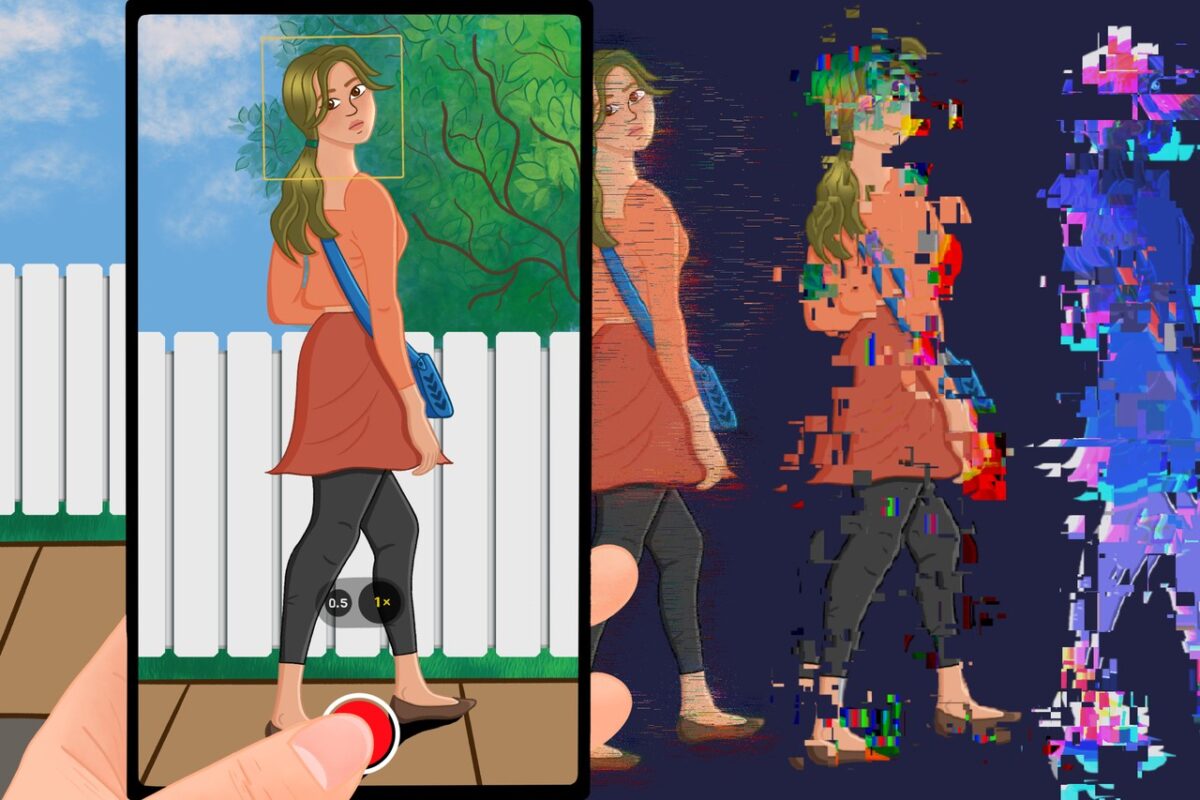
Featured image: Max Gruber / Better Images of AI / Banana / Plant / Flask / Licensed by CC-BY 4.0.
This guide and tool have been developed as part of Bellingcat’s Technical Writing Fellowship.
Bellingcat is a non-profit and the ability to carry out our work is dependent on the kind support of individual donors. If you would like to support our work, you can do so here. You can also subscribe to our Patreon channel here. Subscribe to our Newsletter and follow us on Twitter here and Mastodon here.